The practice of dynamic exercise set "Surya Namaskar" (Sun Salutation) is presented in every hatha yoga school. And in every style it is marked by its own peculiarities. Even though you can not find these exercises in the yogic scriptures of Middle ages (there are only Sun Salutation mantras described in Puranas but no dynamic asana sets), they are likely to have existed for quite a long time, serving as a perfect warmer before asana practice.
Understanding the principles connecting asanas in dynamic sequence, you can diversify the practice of Surya Namaskar, introducing additional movements and postures. This way you can create your own custom variants, affecting different movement directions and muscles groups.
In this article I offer “Wild Yogi” readers to try two variants of practice. You can find the first variant with some minor differences in Indian books on yoga under the name of Chandra Namaskar. The second one is a more intensive and advanced version.
Just for fun I have named it “Shakti Namaskar”, as it develop a practitioner’s strength and flexibility, properties that refer to Shakti, the energy of Mother Nature.
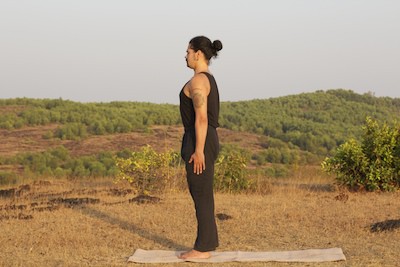
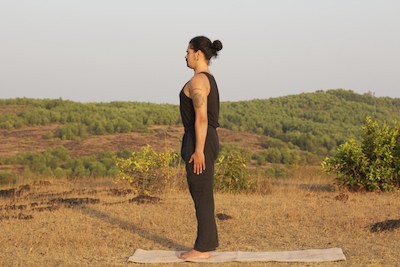
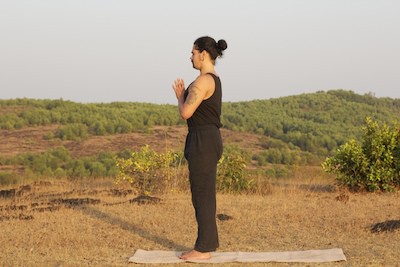
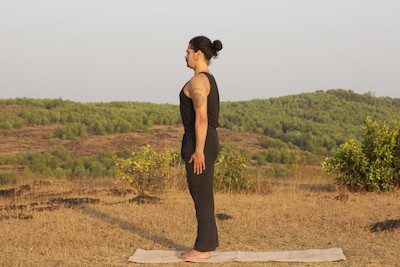
1. Take initial position, samasthiti, feet together, arms down.
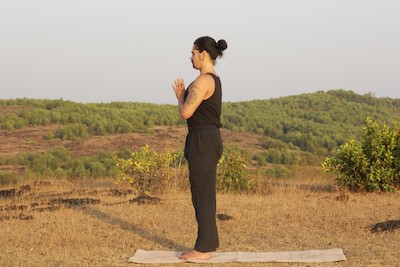
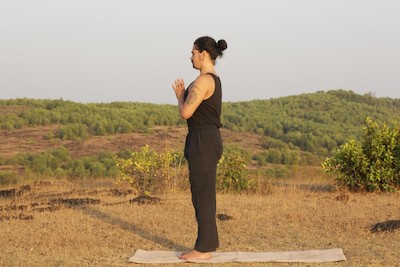
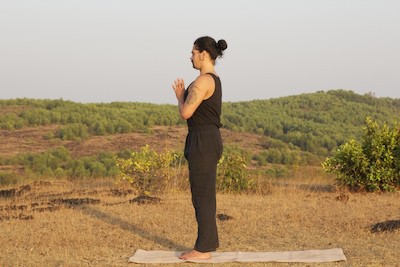
2. Put your palms in front of your chest in Namaste.
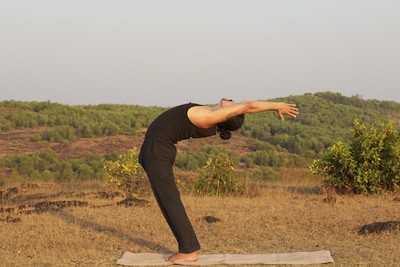
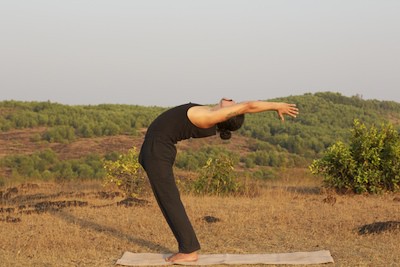
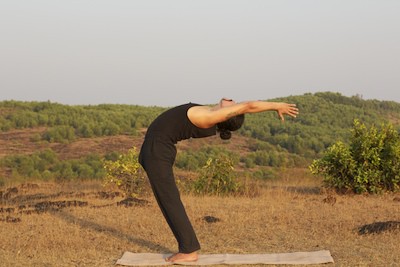
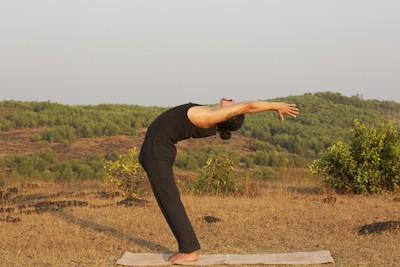
3. Breathe in and stretch your hands upwards, bending from upright position. Remember to hold mula bandha (contract pelvic floor muscles), strain your buttocks and push the pelvis a little bit front, without bending your knees. Arms stretched upwards parallel to ears, elbows straight, don’t drop your head back till the end, don’t loose control of your neck muscles.
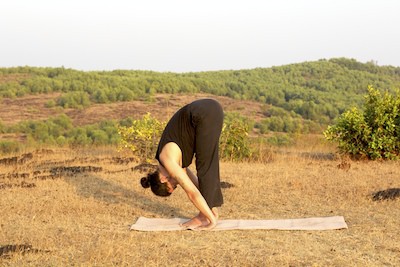
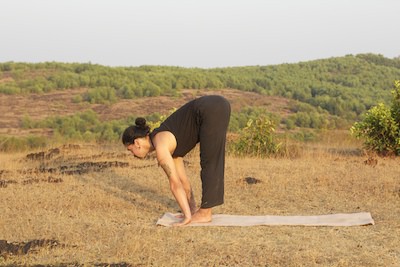
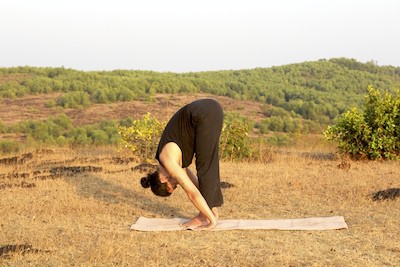
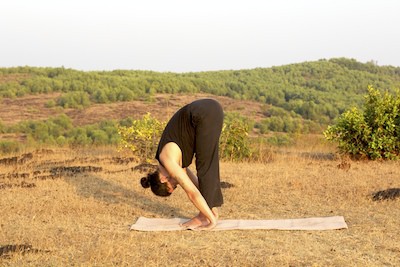
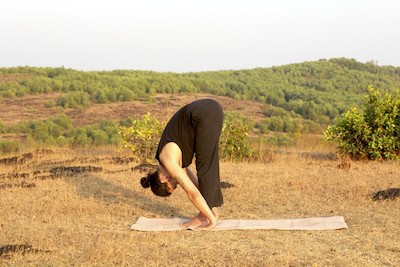
4. Breathe out and return to upright position. Bend forwards into uttanasana. Try to put your hands on the floor to the sides of your feet.
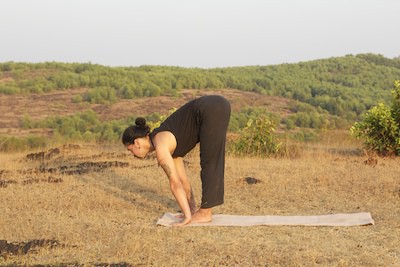
5. Breathe in and look forward, stretching the back.
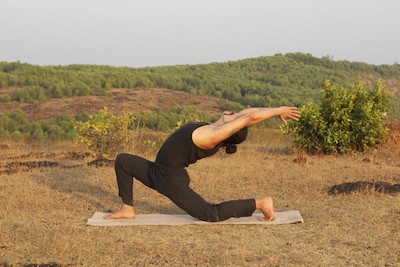
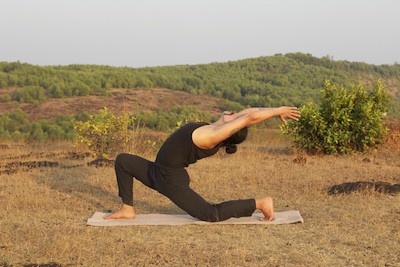
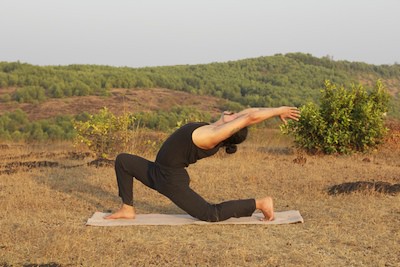
6. Exhale and put your right foot backwards, right knee on the floor, hands on the level of your front foot. Sanchalasana (“wide step”).
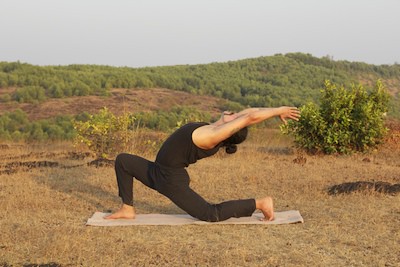
Inhale and put your arms up, bend backwards, keeping your hands to the sides of your head and back muscles relaxed, so to say, “hanging” backwards. This posture is called Anjaneyasana, after Lord Hanuman (Anjaneya is one of his names). Make sure that the knee of your front foot doesn’t go further than its toes, avoiding acute angle in the front knee, the angle should be more or less right.
Breathe out and make your body upright again, put your arms in the same level with the front foot.
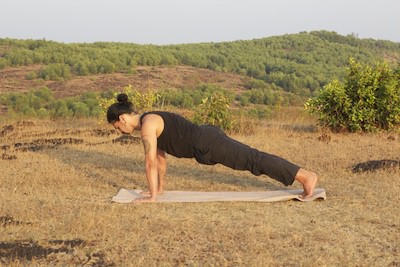
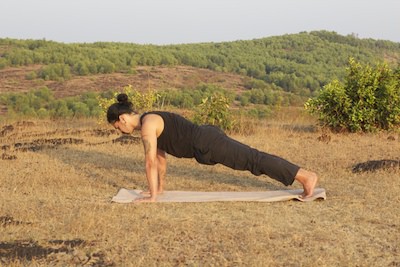
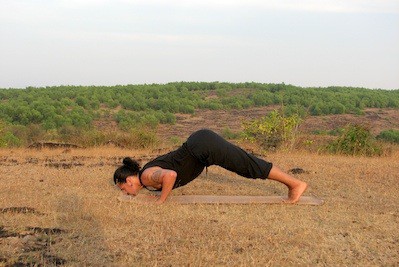
7. Breath in and put your left foot backwards, fixing yourself in Urdhva chaturanga (“plank position”). Make sure the lower back is not bent too much in this position. Try to keep your body and legs on the same line, as it is good for lumbar spine. Make another couple of breathing cycles in this position.
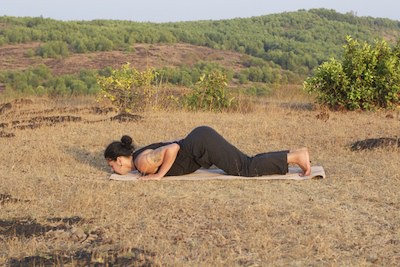
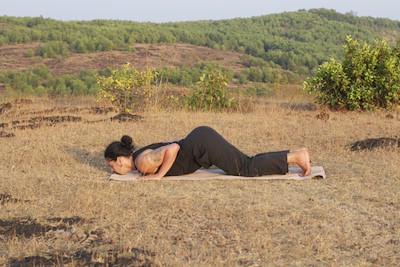
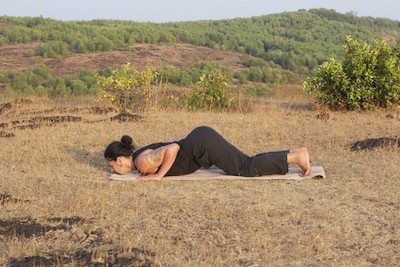
8. Breathe out and place your chin, chest and knees on the floor, fixing yourself in Ashtanga Namaskara posture, “eight touch-points” – chin, two hands, chest, two knees and toes of two feet.
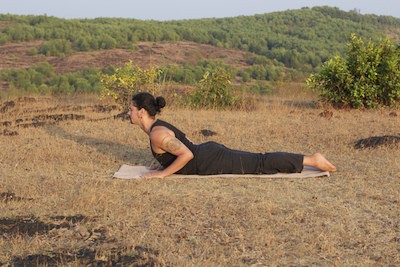
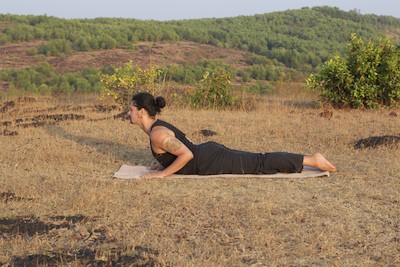
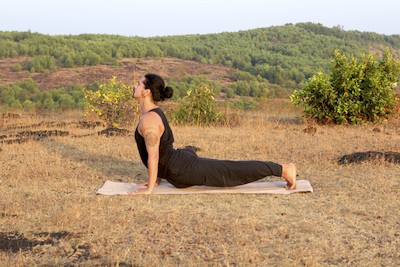
9. Breathe in and crawl out into Bhujangasana (“cobra”). Hold your half-bent elbows to the sides. The body is only half above the mat, to the navel. The navel and area below is on the mat. Our goal here is to bend in the upper back, not in lower, so the arms are not straightened. Make sure your head does not lean backwards fully, instead keep your neck stretched while bending.
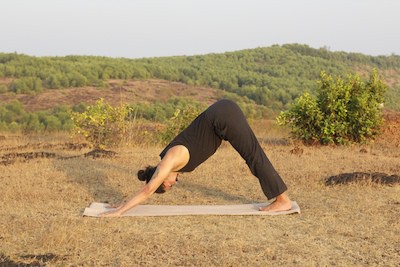
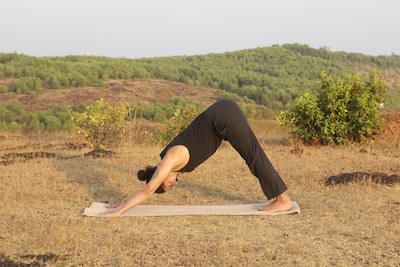
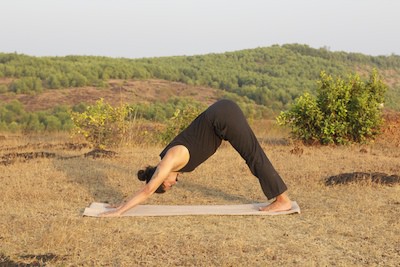
10. Breathe out and push yourself up from the mat into Adho mukha shvanasana (down faced dog). In this variant we do this posture with our feet together, pushing the heels to the floor, feeling the calves and the backs of your legs stretch. You can make several breathing cycles in this position, holding mula and jalandhara bandhas.
11. Breathe in and step front with your right foot into Sanchalasana. Breathe out. Breathe in and bend backwards from the “wide step” into Anjaneyasana. Keep the balance.
12. Breath out and return your palms on one level with your front foot. Bring your left foot back, and return into forward bend, Uttanasana.
13. Inhale and straighten up, put your arms upwards and bend backwards, holding mula bandha and strained buttocks in order to protect the lower back from excessive bending.
14. Exhale and resume upright position, hands together in Namaste in front of your chest.
15. Inhale and exhale, stretching your hands downwards along the body.
Repeat the same cycle again starting with the other side, this time putting the left foot backwards in the “wide step”.
In this version we add a few elements to intensify the training effect.
1. Take initial position, samasthiti, feet together, arms down.
2. Put your hands in front of your chest in Namaste.
3. Breathe in and pull your arms up, bend backwards from the upright position. The same rules, as described in the previous exercise, are applied here.
4. Breathe out and raise into vertical position, bend forwards into uttanasana.
5. Breathe in and look forwards, stretching your back.
6. Breathe out and put your right foot back, but this time leave your right knee above the floor, hold the leg straight, pushing the right heel backwards, trying to stretch the back of right leg without bending the right knee. Sanchalasana (“wide step”).
Breathe in and out your arms up, bend backwards, keeping your arms at the sides of the head, and back muscles lax, so to say, hanging backwards. Perineum area is pulled to the mat, but remember to hold your right knee straight, pushing the right heel backwards. This is variation of Anjaneyasana.
Breath out and rise from the bend, return your palms to the same level with your front foot.
7. Inhale and put your left leg backwards, and fix yourself in Urdhva Chaturanga (“plank”). Do a couple of breathing cycles in this position.
8. Exhale and put your chin, chest and knees on the floor into Ashtanga Namaskara, “eight touch-points”.
9. Inhale and crawl into Bhujangasana (cobra). Keep your elbows half bent, tight to the sides.
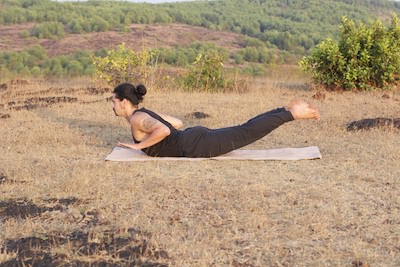
10. Raise your hands and feet above the floor from Bhujangasana, shifting the load to the longitudinal spine muscles. Hold your legs straight. Do a couple of breathing cycles in this posture. It is a variation of Shalabhasana or Naukasana (as it is called in some schools) and it is very good for strengthening the paraspinal muscles.
11. Breathe out and put your hands and feet down and push yourself up from the mat into Adho mukha shvanasana, feet together.
12. In this position do a vinyasa, several dynamic movements from Urdhva mukha shvanasana (up faced dog) into Adho mukha shvanasana. This vinyasa is a good way to strengthen arm muscles, back and shoulders.
Inhaling, bend your elbows, slide down and forwards, trying to keep your chest close to the mat. In this variant we do not roll over the toes, like we do in Ashtanga vinyasa Surya Namaskar, but keep the toes on the floor. Without fixing up faced dog, move back. Try to carry your chest close to the mat, if you can, also when going back. Repeat the vinyasa 3-5 times. If your arms and shoulders do not carry the load, try doing a simplified version, by putting the knees on the mat in the hardest moment.
13. Return into down faced dog and fix it for several breathing cycles, holding mula and jalandhara bandhas, trying to keep your breath calm and slow.
14. Breathe in and step forwards with your right foot, keeping the left one straight. Breathe out in Sanchalasana. Inhale and bend backwards to Anjaneyasana. Keep the balance.
15. Breathe out and put your palms on one level with the front foot and return the left foot back, bending into uttanasana. Experienced practitioners can lock their arms behind the calves to increase the effect, and slide the arm lock a bit lower.
16. Breathe in and straighten your body, pull your arms up and bend backwards, keeping mula bandha and strained buttocks.
17. Breathe out and return back into upright position, hands together in Namaste in front of your chest.
18. Breathe in and out, put your arms down.


